
Employing the Balanset-1A System
Equipment Preparation
- accelerometers, laser rpm sensor, mounting stand, software application, and additional tools.
- Establish a USB connection between the instrument and the computer, ensuring the software is set up properly.
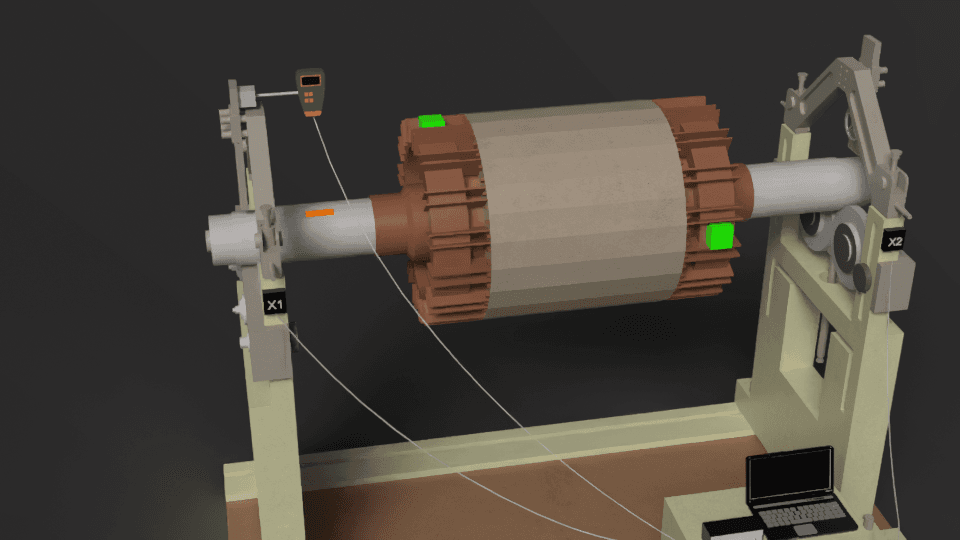
Setting Up the Sensors
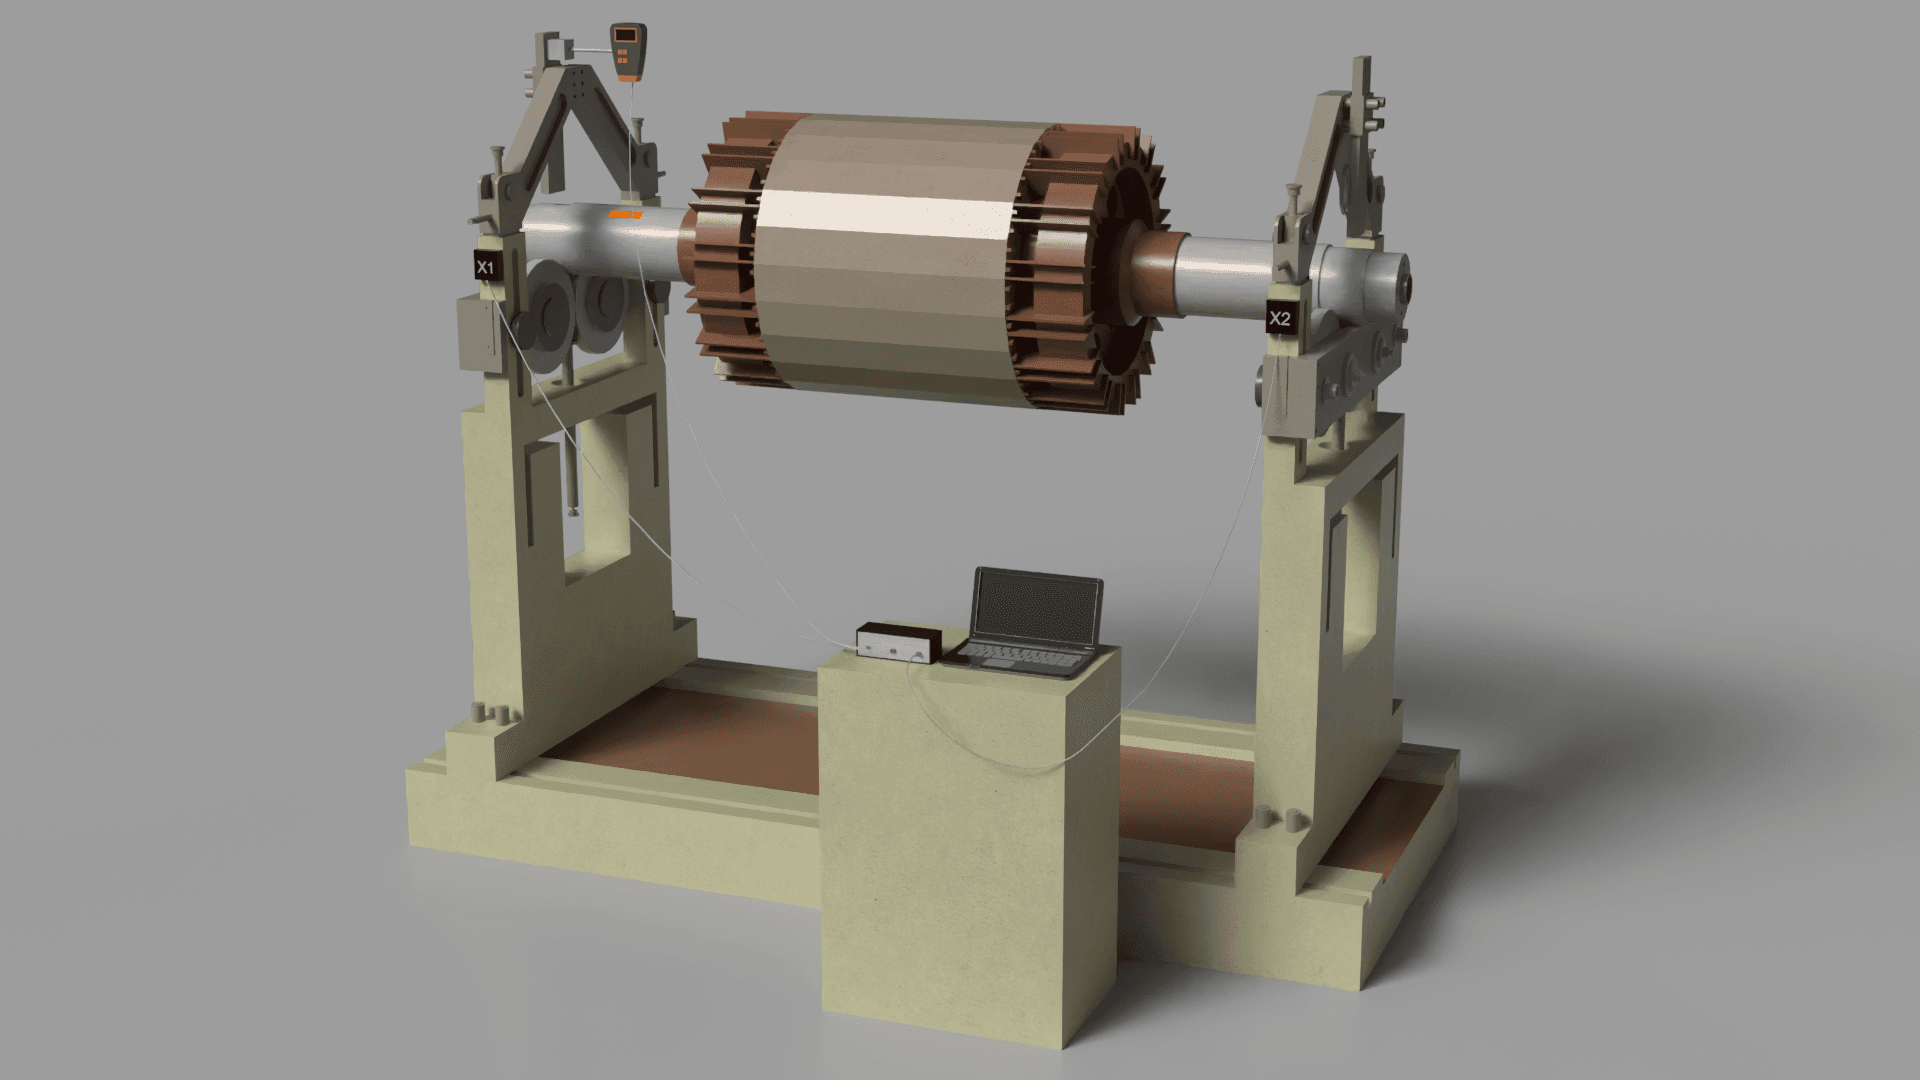
- Mount the vibration transducers securely on the machine’s housing where vibrations are most pronounced, typically near the bearings.
- Direct the laser speed sensor towards the rotor and affix reflective tape to the rotor surface to facilitate phase angle measurement.
Starting the Program
- Open the Balanset application on your PC.
- Select the appropriate balancing mode: single-plane or two-plane, depending on the rotor type and your specific requirements.
- Bring the rotor to its normal operating rotational frequency.
- The software will measure the vibration level, rotational speed, and phase angle. This data establishes the current imbalance condition.
Attaching the Trial Weight
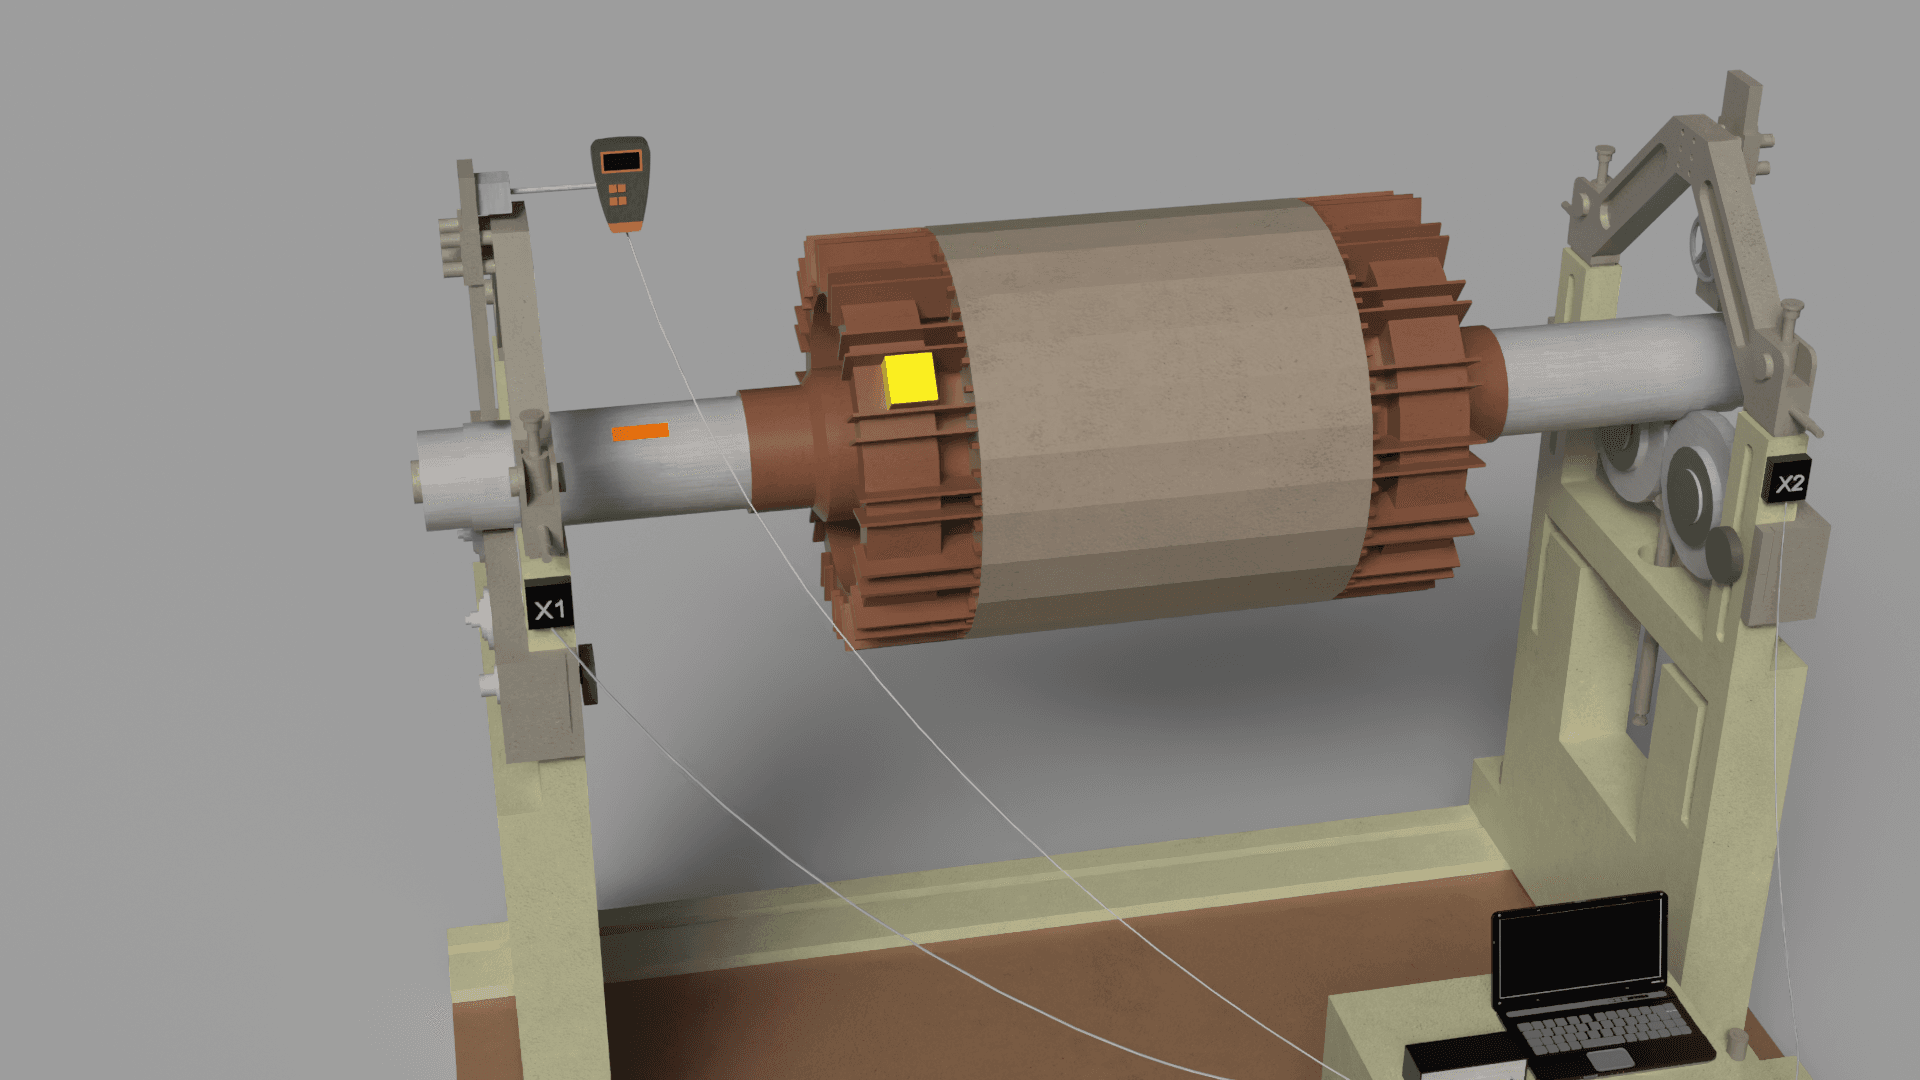
- Stop the rotor and attach a trial weight at a specific location on the rotor. The weight’s mass can be specified within the software (e.g., in grams).
- Run the rotor again, allowing the software to measure the effects of the trial weight on vibration and phase.
Determining the Corrective Mass
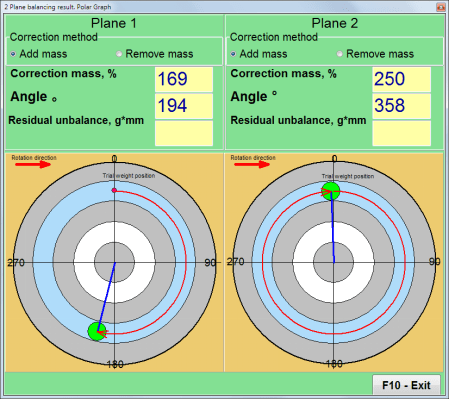
- Based on the measured data, the software automatically calculates the correction weight parameters: mass and installation angle.
- The results of the calculation are shown both numerically and visually through charts and graphs.
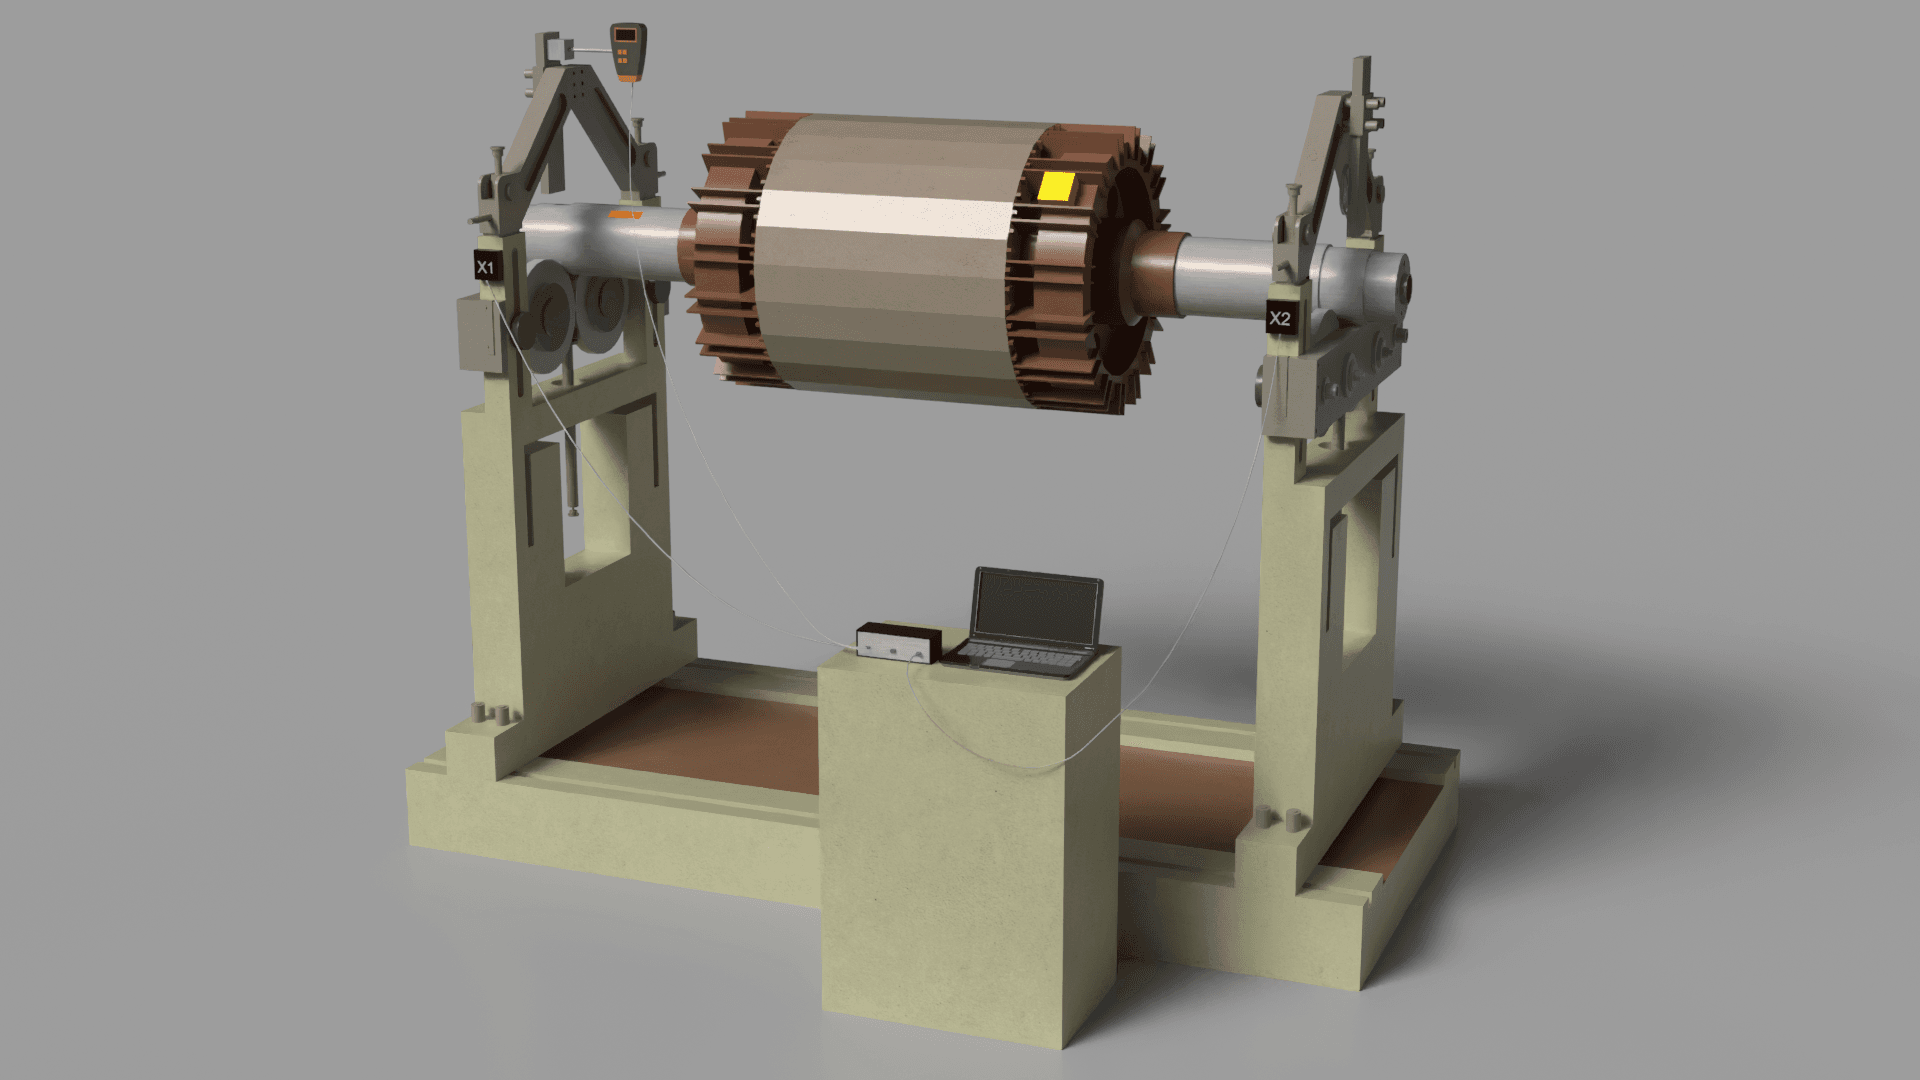
Mounting the Compensating Weight
- Install the correction weight on the rotor according to the software’s calculations.
- You can conduct interim measurements to confirm that the imbalance is decreasing as expected.
Verification and Balancing Completion
- With the compensating weight attached, operate the rotor and assess the level of any residual vibration.
- The balancing procedure is finished if the remaining vibration is within the permissible limits specified in ISO 1940.
- If the vibration level remains high, repeat the process with further weight adjustments.
Creating a Balancing Report
- The balancing results are saved in the software’s archive. You can create and print a report containing vibration data, correction weight mass, and its installation angle.
Post-Balancing Checklist
- Verify the secure attachment of all balancing weights and measurement sensors.
- Ensure the rotor rotates smoothly and without excessive noise.
- If the rotor is part of a complex mechanism, verify the proper interaction of all its components.
Instagram: https://www.instagram.com/vibromera_ou/
Youtube : https://youtu.be/guA6XJ-ArZM?si=vmkuX7RILzKBl0zL
Our website about Balancing machine user groups
Machinio: https://www.machinio.com/listings/98380186-portable-balancer-vibration-analyzer-balanset-1a-full-kit-in-portugal
Facebook: https://www.facebook.com/marketplace/item/350151228150722